Learning how to balance a propeller for your rc airplane is a simple process and it’s worth taking the time to do it; it’s easy to think that all props come out the factory perfectly balanced but that’s rarely, if ever, the case!
A perfectly balanced rc propeller will mean less vibration in your plane and this is very beneficial – severe vibration can cause weaknesses and failures over time, not just in the airframe but also the electronic components of the plane. For the short time it takes to correctly balance a prop, the rewards are large!
The prop-balancing game
The first thing you need to do is buy a propeller balancing tool; you could make one if you’re practically minded but for the few dollars they cost a proper tool is the way to go. You can buy hand-held tools that consist of nothing more than a spindle and prop-clamping device, or you can go the whole hog and buy a desktop balancer such as the Dubro Tru-Spin Prop Balancer. This is my personal choice and I can give it a big thumbs up for getting the job done!
The Tru-Spin balancer is not only top notch for propeller balancing but it can also accept complete helicopter rotor head assemblies, should the day ever arise….
The process for correctly balancing your propeller goes thus:
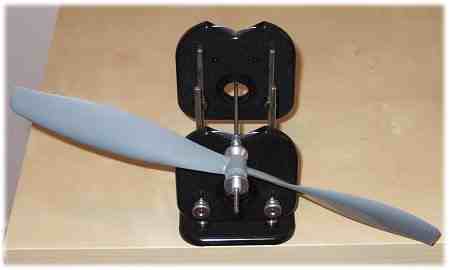
Step 1: Secure the prop to be balanced in to the balancing tool and place somewhere where the prop can hang freely. Also, it’s important that there is no air movement in the room – even heavy breathing over the prop can give you a false reading!
Let the prop swing freely and let it come to a natural stop. If there is a discrepancy in weight between both blades, the heavier blade will hang lower than the lighter one:
Step 2: once you’ve determined that there is a difference in weight between blades, remove the prop from the balancer and either add weight to the lighter blade or remove weight from the heavier blade. You have a few choices here; to add weight to a lighter blade you can add tape or adhesive film to the backside of the blade, or you can use paint or clear lacquer. This is actually the better option because it’s more permanent, tape can come unstuck with time. Whatever you use, add only small amounts at a time and recheck the balance after each addition.
To remove weight from the heavier blade, carefully sand the back side of the blade as close to the hub (center) as you can. Never remove material from the propeller tip as this might impede the performance of the prop.
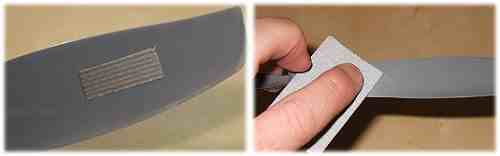
Above left, tape has been added to the backside of the lighter blade. Right, sanding the heavier blade is the alternative option.
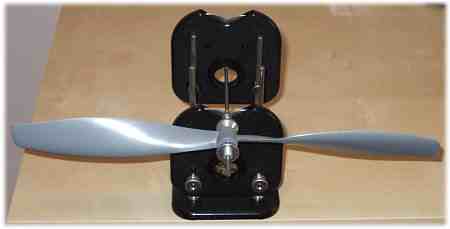
Step 3: keep rechecking the balance after every alteration, you’ll more than likely find that very little weight needs to be added or removed to sort out the imbalance. When the balance of the propeller is correct, the prop will hang level with neither one blade or the other higher or lower.
Remember to balance every propeller that you buy before you fit it to your plane, and recheck the balance on a fairly regular basis; heavy landings can result in small pieces of propeller going missing and this will effect the balance! If the prop gets that badly damaged then you need to replace it.